
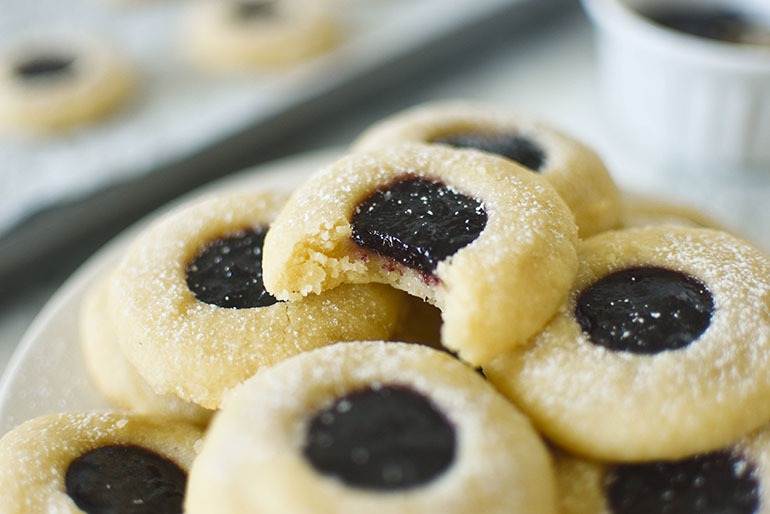
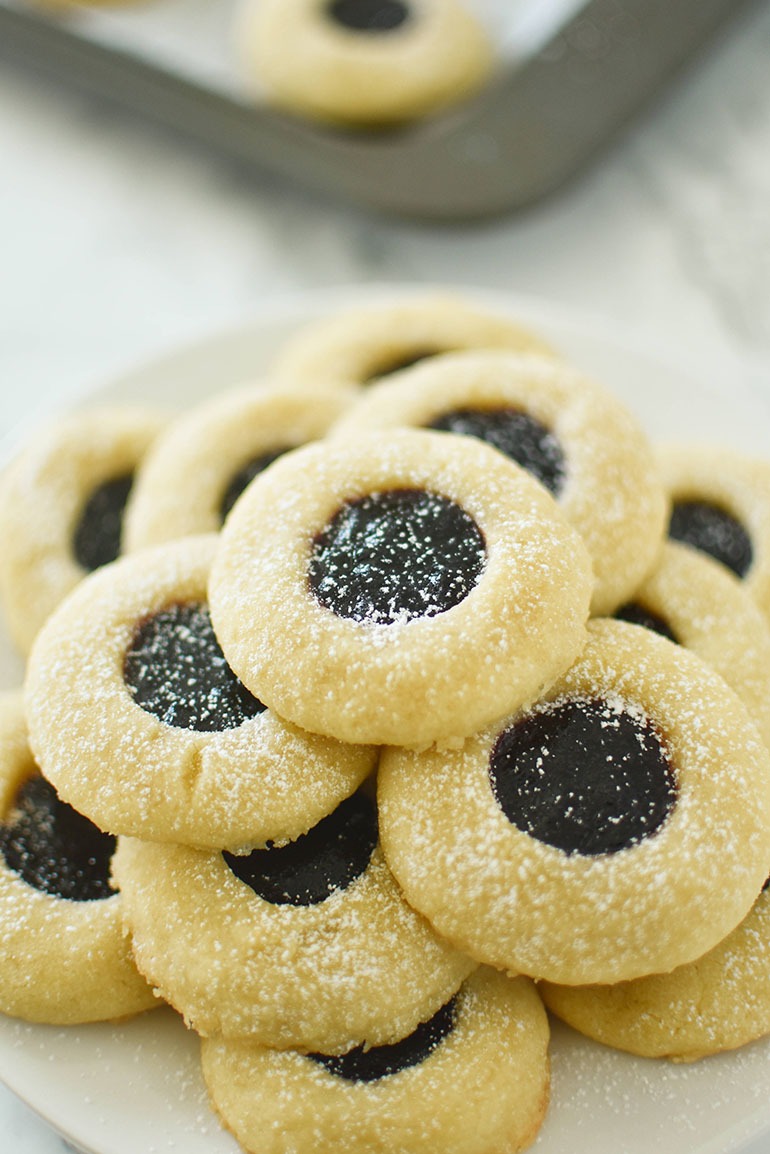
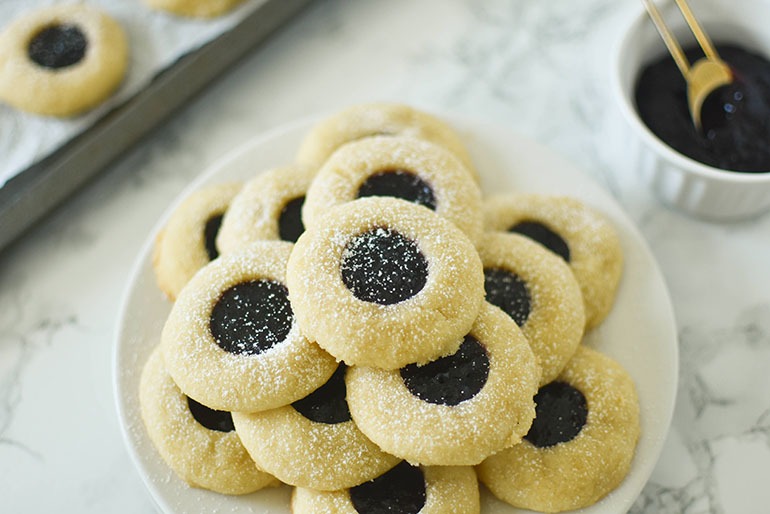
No lie, I just finished eating one of these amazing Easy Vegan Thumbprint Cookies and they are everyyyyything! I’ve been wanting to try my hand at making my own version of these cookies and I finally got around to it!
They make an amazing festive holiday cookie! Perfectly sweetened, buttery, easy to make and best of all DELICIOUS! I know you’ll love these cookies just as much as I do! They’ll be your new favorite holiday cookies!
Ingredients You’ll Need:
- vegan butter as with most any cookie recipe, you’ll start by creaming together the vegan butter and sugar. I typically use Earth Balance vegan butter because you can find it at most grocery stores.
- organic cane sugar – I have only tried using organic cane sugar with this recipe, but I would imagine a sugar alternative like coconut sugar may work as well.
- all- purpose flour – I’ve only made this recipe using all-purpose flour so far, but if you’re looking for a gluten-free version, I think that substituting the AP flour with a 1:1 gluten-free all-purpose flour alternative will work.
- sea salt – a little salt goes a long way! This will accentuate the flavors.
- vanilla extract – I like to use vanilla extract because I always have it on hand, but you could also try using another flavor like almond extract for a little something different.
- jam of your choice – I used blackberry jam in these photos, but I’ve experimented with all sorts of jam and they’re all delicious. Just be sure to use whatever jam you enjoy most!
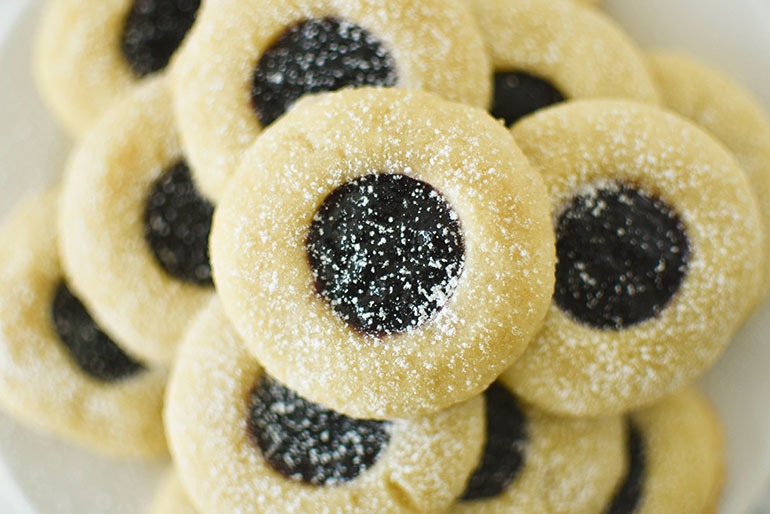
- organic powdered sugar – this is completely optional but I think it helps to make the cookies look more festive. Just sprinkle them with a light dust and they’re even more beautiful!
How to Make Vegan Thumbprint Cookies
Making these Easy Vegan Thumbprint Cookies is BEYOND easy! As you can see from the ingredient list below, you only need 5 ingredients. I think it’s safe to say these are some of the easiest little cookies I’ve ever made.
To start, you’ll cream together the vegan butter and sugar until it appears fluffy. I used my standing mixer for this part so I could measure out some of the other ingredients while the butter and sugar were being combined.
Once you notice that the butter and sugar are combined well, add in the flour, salt, and vanilla extract. Continue mixing until you’ve got yourself a big ol’ ball of cookie dough (try not to eat it lol).
I always use a standard cookie scoop for cookies so that they’re all roughly the same size. Don’t you love uniformity? I do! If you don’t have a cookie scoop, it’s all good. You can use a tablespoon measuring spoon instead. Place each of them on a pan lined with parchment paper. Once you’re done scooping out each cookie, roll them into a nice ball using the palm of your hands.
How to Make the “Thumbprints”
As misleading as it may be, we’re not actually going to use our thumbs to make these Easy Vegan Thumbprint Cookies. We’re going to use a ½ teaspoon to help us out instead.
Wondering why? It just looks neater than your actual thumb would. But by all means if you’re dying to put your thumb to work, be my guest!
Gently press your ½ teaspoon into the center of each ball of cookie dough, carefully pulling it up so that it doesn’t disrupt the shape of the cookie.
You may find that after pressing into the cookie, the outside area starts to get a little rough and wrinkly. To avoid this, just lightly press the area back together with your fingers.
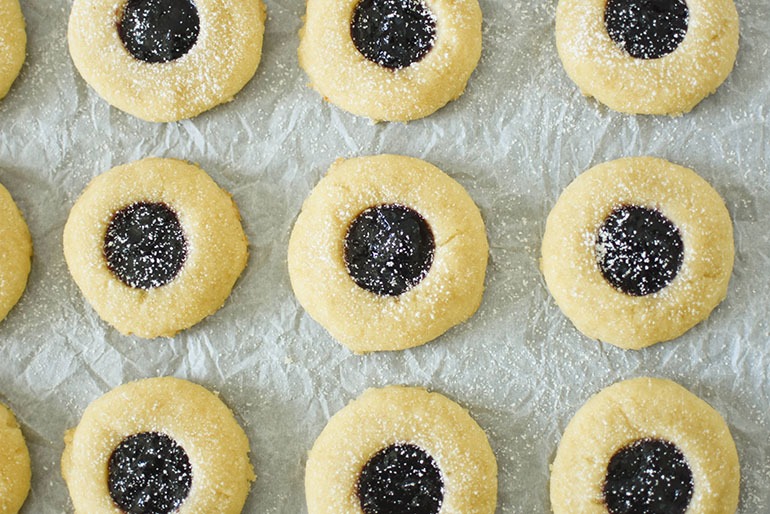
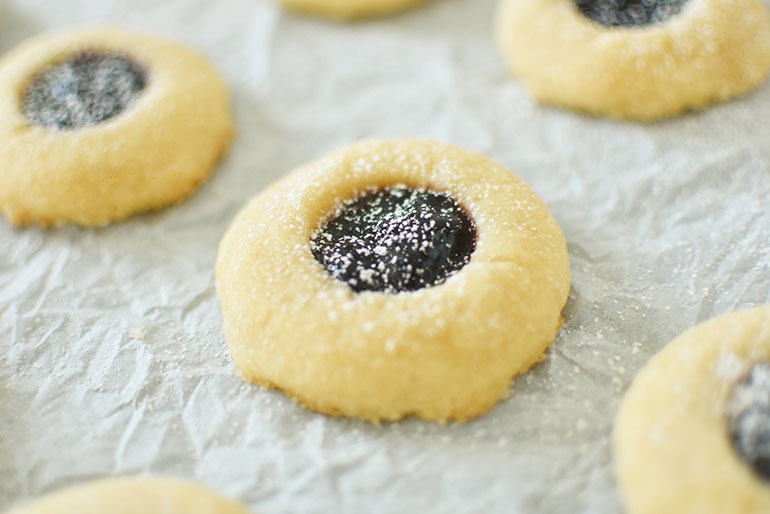
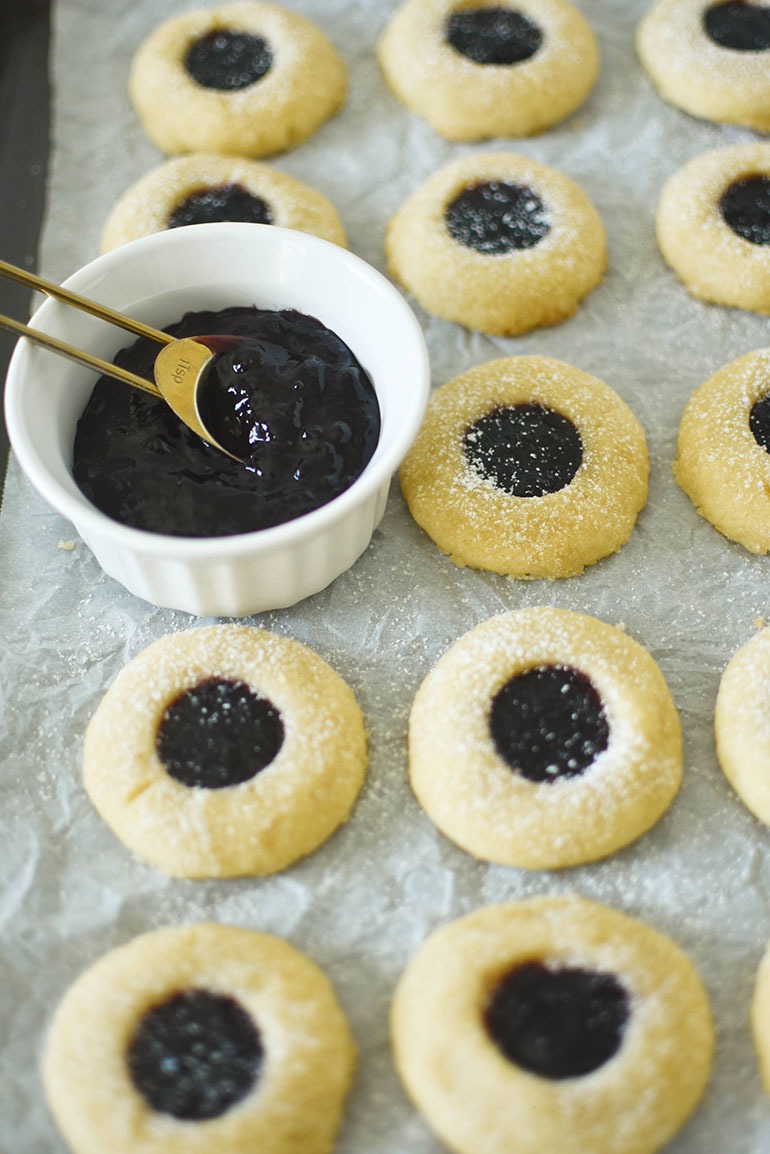
Using that same ½ teaspoon from earlier, scoop out a portion of the jam and add a dollop to the centers of each cookie where we placed the “thumbprints.” If you’re jam is anything like mine, you may find that it needs a little help coming out of the ½ teaspoon. If this is the case for you too, just grab that butterknife again to help scrape it out.
Once all of the cookies are filled with your favorite jam, place them in the fridge to chill for 15 minutes. This is important! I’ve tested this recipe a few times and got the best results when I let the dough chill!
Once the Vegan Thumbprint Cookies have chilled, you’re ready to start baking! Toss those babies in the oven and let them bake for 10 minutes. When they’re done, set them out on the counter to cool before going at ’em. Once they’ve cooled you can sprinkle them with a little powdered sugar to dress them up a bit. Not necessary at all, but it makes them more festive in my opinion.
Vegan Thumbprint Cookies FAQ:
How can I customize these Vegan Thumbprint Cookies?
The cool thing about making these Easy Vegan Thumbprint Cookies is that you can customize them however you’d like by using any kind of jam you wish to fill the insides! I used a simple blackberry jam for these beauties, but you can use whatever flavor you prefer: strawberry, blueberry, apricot… seriously whatever floats your boat!
How can I smooth out clumpy jam?
Because jam kinda solidifies and likes to clump together, for the best and easiest results, you’ll want to make sure you give your jam a good stir with a butter knife to help break up the clumps and smooth it out a bit. This will help make things a whole lot easier when you scoop it out.
Do I need to chill the dough?
Yes, I definitely recommend doing so. I know, I know, it’s just one more thing to do, but trust me on this. It works.
It keeps the Vegan Thumbprint Cookies from spreading too much and spreading ain’t cute! Just go wash some dishes and clean up the kitchen while you’re waiting. They’ll be done chilling before you know it!
Do I need an electric or standing mixer to make these cookies?
Nope! You can absolutely do this all by hand. Using an electric mixer is just a matter of ease. They’ll taste great either way!
To make these Vegan Thumbprint Cookies by hand this is what you’ll need to do:
Step 1: In a large bowl, mix together the softened vegan butter and sugar using something firm like a wooden spoon or silicone spatula. Mash/mix these together until you’ve created a creamy, smooth texture.
Step 2: Once the vegan butter and sugar are mixed, add in the flour, salt, and vanilla extract.
Step 3: Continue using your wooden spoon or silicone spatula to combine the ingredients together until just combined and a dough is formed. If the dough is still dry and crumbly, feel free to add in a teaspoon or water or plant milk at a time until you’ve made a firm dough.
Step 4: Pick up at step 4 in the recipe card instructions to continue with making the cookies.
How do I store these cookies?
You can keep these cookies fresh by storing them on the counter in an air-tight container for 3-4 days or in the fridge for up to one week.
Can you freeze Vegan Thumbprint Cookies cookies?
Yes! Once completely cooled you can store these cookies in an airtight container in the freezer for up to three months. If you need to stack them, I find it best to separate the layers with parchment paper so that they don’t stick together while frozen.
Can this recipe be made gluten-free?
I’ve only made this Vegan Thumbprint Cookies recipe using all-purpose flour so far, but if you’re looking for a gluten-free version, I think that substituting the AP flour with a 1:1 gluten-free all-purpose flour alternative will work.
How can I customize this recipe?
You don’t necessarily have to fill these Vegan Thumbprint Cookies jam. There are a variety of different alternatives that would work well:
- Nut butters (like peanut butter or almond butter)
- Preserves (like strawberry or apricot)
- Apple butter
I used a blackberry jam I already had on hand to fill my vegan thumbprint cookies, but if you want to use something else, go for it! You could even alternate between fillings if you’d like.
Tips for Making the BEST Vegan Thumbprint Cookies
- Make sure your vegan butter is softened, not melted. Just set it out on the counter for a few hours until you can easily press your finger into it from outside of the packaging.
- Don’t over mix. Keep an eye on your batter as it’s mixing. It will turn into dough pretty quickly. Over-mixing can throw off the consistency and texture of your cookies. Trust me, you don’t want no parts of that!
- Use a standard cookie scoop. This will give your cookies a uniform look and ensures all of your cookies will be done at the same time.
- Make the “thumbprints” while the dough is still warm. I found that the dough cracked less doing it while the dough was still warm and pliable, as opposed to rolling the dough, refrigerating it, and then making the “thumbprints.”
- Use a measuring spoon to make the “thumbprints.” This too will help with uniformity. If the dough still cracks, it’s okay. Just use your finger to gently smooth it out.
- Stir the jam very well. Jam by nature is clumpy. Stirring it well will help break the clumps and make it easier to distribute.
- Chill the dough. This one is soooo important. If you want cute cookies, chill the dough! Especially if you’re using vegan butter that you fear might be too soft. This will help keep the cookies from spreading too much and loosing their shape.
- Use a tea ball to sprinkle the powdered sugar. There are a lot of things you could use to distribute the powdered sugar nicely, but I like to use my metal tea ball. Scoop a little powdered sugar inside, close it and gently tap the sides to get it to sprinkle out. Works every time! Be sure to do this once the cookies have cooled.
I know you’ll love these Easy Vegan Thumbprint Cookies! They’re so easy to make and hard to resist! Not to mention, they make for great gifts during the holiday season.
Arrange them nicely in a cookie tin and gift them to a friend or family members. The perfect holiday treat! Give them a try and let me know what you think in the comments below!
Other Cookies You’ll Enjoy:
- Vegan Sprinkle Sugar Cookies
- Vegan Matcha Sugar Cookies
- Vegan Salted Chocolate Chip Cookies
- Vegan Lemon Sugar Cookies
- Vegan Brown Sugar Cookies
- Vegan Cranberry Oatmeal Cookies
Hungry for more? Follow me on Youtube, Pinterest, Instagram, Twitter, and Facebook!

Easy Vegan Thumbprint Cookies
Ingredients
- ½ cup vegan butter softened (I used Earth Balance)
- 6 tbsp organic cane sugar
- 1 cup + 2 tbsp all- purpose flour
- ¼ tsp sea salt
- ½ tsp vanilla extract
- ⅓ cup jam of your choice (stirred well to break up any clumps) I used blackberry jam
- organic powdered sugar for garnish (optional)
Instructions
- Preheat oven to 350°
- In a large mixing bowl, cream together the softened vegan butter and sugar with an electric mixer until it appears fluffy.½ cup vegan butter, 6 tbsp organic cane sugar
- Add in the flour, salt, and vanilla. Continue mixing until well combined and the dough has formed.1 cup + 2 tbsp all- purpose flour, ¼ tsp sea salt, ½ tsp vanilla extract
- Using a standard cookie scoop, scoop out 13 balls of dough and roll each into a ball using the palms of your hands. Place on a pan lined with parchment paper, evenly spaced.
- With a ½ teaspoon, gently press a "thumbprint" into the center of each ball.
- With the ½ teaspoon, scoop out a spoon full of the well stirred jam and place in the "thumbprint" area (I used a butter knife to help get the jam out) of each cookie.⅓ cup jam of your choice
- Transfer the baking pan to the fridge for 15 minutes, then bake for 10 minutes in the oven.
- Allow the cookies to cool completely. Once cooled, use a tea ball to garnish with a few sprinkles of powdered sugar. Enjoy!organic powdered sugar

Made these last night, and they are delicious! I didn’t have to tweak anything, and they turned out pretty and yummy. I filled mine with raspberry jam, so they will look festive on a christmas cookie tray. Highly recommend.!
“Oh wow!” was what I said under my breath when I tried my first one (still warm from the oven). I doubled the recipe and used strawberry-peach jam from our farmers market. They are so simple, I was able to make them with 2 three year olds and a one year old “helping” me. I can tell these are going to be an issue for me. I’m going to try and freeze them to give them out to neighbors for gifts next week but I am starting to think they won’t last that long! My only complaint is that the dough cracked around the edges when I was making the “thumbprint” which I was worried would cause the jam to ooze but luckily it set in place and they look perfectly imperfect now that they are baked.
These are amazing!!! I made these yesterday as a trial to see if I wanted to add these cuties to our Christmas Cookie exchange and they far exceeded my expectations….I used strawberry preserve and they were delicious. I love the simple ingredients and the rich buttery taste.